Astro Quick Start Guide

This guide teaches you how to integrate an Astro website with dotCMS and use the Universal Visual Editor (UVE) to manage the layout and rendering of content.
Overview
dotCMS integrates with Astro to support a wide assortment of features. We'll be focusing on:
Creating and authenticating an Astro front end for use with the dotCMS back end
Configuring your site to integrate with the Universal Visual Editor (UVE)
Editing page layout and content with the UVE
Prerequisites
dotCMS websites use
@dotcms/client,@dotcms/react, and@dotcms/next.Node.js & npm/yarn: Ensure you have Node.js and
npminstalled.Basic Knowledge: Familiarity with Astro fundamentals and REST/API concepts.
Step 1: Create Your Astro Application
Use the official dotCMS Astro sample site as a template to create your Astro application locally. Navigate to the directory you want to install the Astro application in and run the command below, this will create an Astro application based on the dotCMS sample.
npm create astro@latest -- --template dotcms/core/examples/astroFollow the Astro setup steps after the example is pulled. This creates an Astro application that uses http://localhost:4321 to render in your browser.
Step 2: Configure and Run
Generate an API Token
Before creating your Astro application, access the demo.dotcms.com instance (or your local instance) and generate an API Access Token for the Admin User:
If accessing the dotCMS demo instance:
https://demo.dotcms.com/dotAdmin
User:
admin@dotcms.comPW:
admin
Note: The demo instance is reset twice per day
Create an API Access Token:
Navigate to Settings > Users
Select the Admin User
Click the API Access Tokens tab
Click the Request New Token button.
Configure the Connection to dotCMS
Open the Astro project in your code editor at the root, find the file .env.local.example and rename it to (or make a copy named) .env. This file will contain the environment variables for the demo.dotcms.com instance.
Open the .env file and update the following environment variables:
PUBLIC_DOTCMS_AUTH_TOKEN: This is the API Access Token you generated for the Admin user in the demo.dotcms.com instance in Step 1 above.
PUBLIC_DOTCMS_HOST: This is the URL for the dotCMS instance, such as https://demo.dotcms.com or http://localhost:8082.
PUBLIC_DOTCMS_SITE_ID: (Optional for a single-site instance.) This can be either the Site ID or Site key for the website you will be managing in the dotCMS instance.
Run the dotCMS Astro application locally
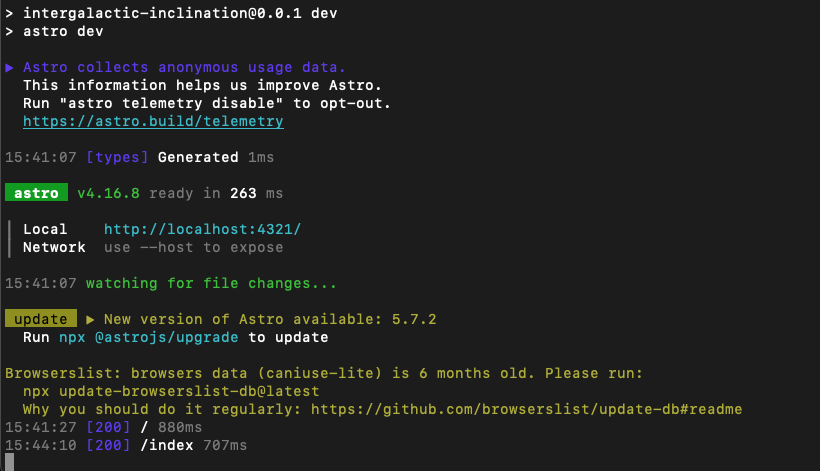
Run the dotCMS Astro example locally to see it in our browser. Navigate to the root directory of your Astro application (e.g. intergalactic-inclination) and execute the following:
npm install

npm run dev
Your terminal will output the following, and when you navigate to http://localhost:4321 on your browser, you’ll see the dotCMS Astro example application running.
🎉 Congratulations! The application is running. Now, let's complete the integration by getting the editor involved.
Step 3: Universal Visual Editor
The dotCMS Universal Visual Editor (UVE) provides a seamless editing experience directly on your Astro website. This editor offers a powerful way to build pages, with features including, but not limited to:
In-context editing: Edit content directly on your website
Drag-and-drop interface: Easily arrange components on the page
Responsive design tools: Preview and edit for different screen sizes
Enabling the Universal Visual Editor
Now, we need to configure the Universal Visual Editor application within your dotCMS instance. This will allow it to recognize the Astro application and render it in the UVE.
In dotCMS, navigate to Settings > Apps and click on “UVE - Universal Visual Editor”
Click the plus button at the right of the site we're integrating (i.e.,
demo.dotcms.com).In the Configuration field, add the following JSON object, which contains the URL for your local Astro application:
{ "config":
  [
    {
      "pattern": ".*",
      "url": "http://localhost:4321",
    }
  ]
}
Click Save.
Now, navigate to Site > Pages > Home to check out the Astro application integrated with dotCMS!
Editing Content in the Universal Visual Editor
Let’s edit the Home page.
Inline Text Editing
Navigate to Site > Pages > Home if you are not already there.
Click the title ("Explore the World") and note the in-line editing interface.
Add some text!
Click out of the banner area and note the auto-save notification that pops up.
Click on the dropdown at the top left of the screen (which currently says "Draft").
Select Published; the screen will refresh to the currently published version.
This will not show the change you just made — it hasn't been published, yet.
Now select Preview from the same dropdown.
Your draft changes will be visible without the editing controls.
Select Draft from the same dropdown to return to Edit Mode.
Drag and Drop Content
Click on the
Xicon at the top right of the Explore the World bannerThis will remove the banner once you Accept the change.
You will now see an empty container on the page.
In the Content Palette, on the right, browse into the Banner content type by clicking its corner arrow.
Drag a new Banner contentlet into the empty box on the page.
The new banner will render and the page will be saved.
Adjust Layout of the Page
Click on the Layout tool in the rightmost panel.
Drag a Row from the toolbar and drop it below the first existing row.
Grab two more Box items and drag them into the new row.
Resize them all to be equal widths.
Click the Content button in the right panel, and see the four empty containers.
Add Content
Let’s fill the new boxes! Click on the Product content type on the Content Palette.
If you can't find it, use the search field at the top.
Drag some Products into the empty slots.
Click the mode dropdown in the top left, and select Preview to see how it looks without UVE controls.
Click back to Draft to get back to Edit Mode.
Click the blue Publish button on the top right corner of the screen.
Check Your App!
Now refresh the browser window that has the Astro application running (localhost:4321), and you will see the changes you made from the back end.
You are now up and running — your Astro site is fully integrated with dotCMS!